


Showing posts with label SHOOTING. Show all posts
Showing posts with label SHOOTING. Show all posts
Wednesday, April 16, 2014
How Many Easter Peeps Does it Take to Stop a Bullet?
Typically, Kirsten Joy Weiss can be found attempting some pretty wild trick shots on her YouTube channel. But the former college All-American and present member of Team Lapua takes time out of her busy schedule to answer one of the more pressing questions of the day – exactly how many Peeps will a .22LR shoot through?

Tuesday, April 15, 2014
Maximizing Shooting Efficiency for Turkey Hunting

Before you load up and hunt, you must know the maximum effective range of your gun, choke and load combination. That can only be accomplished by spending time at the range.
Critical aspects of bringing home a long beard happen way before the start of turkey season. Testing to discover the maximum range of your gun and the most effective combination of choke and loads are preseason musts.
Killing turkeys at longer distances is possible with today’s plethora of ammunition and choke tubes. A critical factor, of course, is the hunter’s personal ethic and comfortable kill zone. For some, that’s within 30 yards. For others, it might be farther. That’s part of the hunting process we have to decide and must live with.
Maximizing long-range efficiency with your shotgun and ammunition requires trial and error at the range.
Ammunition and choke tubes are expensive, so combining efforts with fellow hunters is a good way to spend time learning about which setup works best for you. Three or four hunters chipping in, bringing chokes and ammo and spending a few hours patterning loads is paramount to discovering what works best so you’ll be comfortable in the woods.
“At 40 or 50 steps, or any range for that matter, I want to get 10 hits in the kill zone of a life-size turkey head target with an even pattern that surrounds it,” said Brandon Wallace, a 33-year-old Alabama hunter and founder of Wallace Custom Calls. He’s chased turkeys for two decades.
“It only takes one hit in the bone of a turkey head to put it down for the count. Lots of guns and loads do this at 30 yards, and many will also do it farther. Everyone likes the holy grail of 300 pellets in a 10-inch circle, which is awesome, but it takes a special load, choke and lots of range time to do it.”
Know Your Limitations

Hornady’s Heavy Magnum Turkey loads.
Wallace noted that, “Some guns might be 30-yard guns, and some might be 50 and beyond,” which is why range time is so critical. Clark Bush, founder of AllAboutShooting.com, has spent hundreds of hours at the range testing chokes, shotguns and ammunition through the years, and he agreed that knowing your setup’s efficiency — and limitations — makes all the difference.
“I buy butcher paper by the rolls and spend a lot of time at the range,” Bush said. “I shoot everyone’s chokes, guns and ammo. There’s no way to know how a gun patterns until you’re at the range.
“I’m not into numbers (of pellets) as much as I want to see a good, even core density within a 10-inch circle at 40 yards, or a 14-inch halo around it and good density. It’s not subjective. If it has a gap in it of more than 2 inches, I don’t find that acceptable. The problem I see with that is (hunters) pattern these in the middle of summer, and we hunt mostly in spring and autumn. Those patterns are affected greatly by ambient temperature and density.”
Time or financial constraints might keep hunters from getting to the range several times a year in various seasons. But Bush believes it’s necessary to shoot in different seasons and weather conditions to truly discover what your gun and ammunition can do.
Turkey hunters dream of gorgeous spring days, warm temperatures and sunny skies. But the reality is we might have a late winter, hotter-than-normal temperatures or a late cold front that blows in. If you have only patterned your gun in summer, those cold temperatures could alter the dynamic of the shot pattern.
Pick The Right Choke
Mark Bansner spent years designing and refining choke tubes for hunters and competitive shooters, working in thousandths of degrees of constriction to create maximum downrange patterns.
Mark Bansner spent years designing and refining choke tubes for hunters and competitive shooters, working in thousandths of degrees of constriction to create maximum downrange patterns.
Today, Bansner is out of the choke business and instead focuses on designing custom rifles from his company headquarters in Pennsylvania. He’s applying his knowledge of shotguns and accuracy to rifles, and believes turkey hunters can do the same to maximize their success.
“I think the No. 1 thing is to have a gun with a barrel that’s 24 inches long,” Bansner said. “I think that’s the optimal length for a shotgun barrel. Shotgun powders burn extremely quick and are exhausted by the time the shot column gets to about 22 or 23 inches. Anything longer than that actually slows it down. I proved that more than 25 years ago by cutting barrels in 1-inch increments and chronographing it.
“After hundreds of rounds, I determined … there’s no real difference between 18 and 24 inches, but 21 to 24 inches is perfect. From a power and velocity standpoint, the barrel should be 21 to 24 inches. From a patterning standpoint, in the old days, copper-coated was king, and I was an advocate of using a larger pellet. But with today’s alloy loads and heavier loads, like tungsten polymers, their No. 5 shot is equivalent of the penetrating qualities of No. 4 lead.”

Patternmaster Code Black choke
Wallace noted the Nitro combos, such as the 5-by-6-by-7, and other turkey loads today are combinations of different shot sized or souped-up polymers. Some turkey hunters stick with lead pellets — for tradition, finances or both — as their top performer. Whatever the load, Bansner said matching the choke tube to the ammo is keenly important to get the best results.
“Pellet size is critical,” Bansner said. “You might shoot 6s or 7s and get 40 or more pellets in the head (area), but you might not be doing anything with them if the energy isn’t there. Knowing the limitation of your gun is important. Once you figure that out, the choke systems today, and even the ones we were producing years ago, will help.”
Monday, April 14, 2014
In Turkey Hunting, Practice Makes Perfect

Solid preparation helps ensure success during turkey season.
Because the main tool of turkey hunting is a shotgun, some hunters get the false impression that it produces a large pattern of shot, making it easy to hit a target. So, they tend to skip shooting practice. But with fine-tuned barrels and high-tech shotshells designed to take down gobblers beyond 40 yards, that way of thinking is far from reality.
Be Sure Your Gun Will Deliver
The first task is to ensure that your shotgun setup produces the best shot pattern possible. Whether you prefer a 12- or 20-gauge, or a 3½-inch or 2¾-inch shotshell, the golden rule for choosing a turkey shotgun is to select a gun that you’re confident in and comfortable shooting.
A Helpful Sight

Weaver Kaspa VZT Turkey Scope.
Tight patterns delivered by constrictive turkey chokes mean you’re trying to hit a baseball-sized head with a basketball-sized swarm of small pellets at long distances. An upgrade in shotgun sights will improve your success rate. There are many turkey-specific sight systems available. Rifle-style peep sights and electronic red-dot-type sights are popular choices among turkey hunters. A magnified scope with a turkey-specific reticle might be the best option because it lets you fine-tune your shot pattern. Using the scope’s elevation and windage turrets, you can move the gun’s point of impact so the densest part of the pattern is at the point of aim.
Advanced Ammo
Vary your shot sizes and brands from several distances, and stick with the one that gives you the most consistent pattern. That said, it’s next to impossible to get good long-range patterns out of inexpensive lead loads. Products that incorporate advanced technology and high-grade shot produce the best results. For example, Federal Premium Heavyweight turkey loads feature the innovative FliteControl wad, which helps ensure tight patterns downrange. This is coupled with Heavyweight pellets, made of an ultra-dense tungsten alloy that is 15 percent heavier than lead to provide greater downrange velocity and knockdown power.
A Tight Choke
Typically, too much choke constriction causes the pellets to become deformed and inaccurate. Too little choke can throw your pattern too wide, leaving little density in the kill zone. You might find something that delivers better results. In general, more open choke constrictions are better suited for larger pellets, such as No. 4s. The tighter chokes in the .640- to .655-inch range are designed for smaller shot, such as size No. 7. Don’t be afraid to keep experimenting with various choke and shot size combinations.
The National Wild Turkey Federation, among others, suggests the ideal pattern for turkey hunting is 100 pellets in a 10-inch circle at 40 yards. Note that it’s also important for this pattern to be spread out consistently. Large gaps within that 10-inch circle could cause a miss.

Don’t just spend time shooting off a bench.
Practice in Realistic Scenarios
Ditch the shooting rest and make your practice sessions as realistic as possible. Step away from the shooting bench, and practice while sitting on the ground with a solid backstop behind you, just like you’re sitting up against a tree during a real hunt. You should have at least one practice session wearing your hunting clothes and vest. If you plan on using specialized accessories, such as a monopod or a padded shooting rest that attaches to your knee, you need to practice using those, too.
Practice Your Shot Repetitively
To become proficient at other shotgun sports — such as trap, skeet and sporting clays — athletes take thousands of practice shots before competing. Turkey hunters can benefit from repetition, too. Master the physical acts of flipping the safety, accurately placing your aim, steadying your shot, taking a deep breath and properly squeezing the trigger.
For repetitive shooting practice grab a box of clay targets and less expensive target ammunition. Standard clay targets are roughly the same size as a gobbler’s head, about 4 inches in diameter. For a greater challenge, choose mini-sized clays that are about 2 inches in diameter. The simple way to set up stationary clay targets intended for turkey training is to sharpen the ends of several 2-foot sticks, shove them in the ground and hang the targets from them. Try putting some brush or other obstacles in front of some of the targets to make for more realistic hunting scenarios.
Train and Condition
Turkey hunting is a physical activity that you should train for just like other athletic sports. You should train and condition yourself to be in good physical condition before hunting season, because to make a good shot, you need strength and endurance. During shooting practice at the range, pack your favorite mouth call. Sound off a long, loud calling sequence until you’re huffing and puffing, and then take aim at a distant target and squeeze off a shot. Run a few short sprints in the parking lot, knock off a dozen pushups, or jump rope for a few minutes until your heart is pounding and you’re breathing hard, and then immediately sit down and practice your shot.
Sunday, April 13, 2014
Tiger McKee’s Real Fast Pistol Training
It doesn’t matter if you holster a striker-fire polymer or a good old single-action 1911, there are skills that translate over the entire spectrum of semi-automatic pistols and are musts to learn. Tiger McKee goes over a good cross section of these important pistol manipulations in this video.
The founder of the Shootrite Firearms Academy in Alabama touches on the finer points of loading, reloading and dealing with malfunctions with a semi-auto. The pistol training might seem basic, but these skills are among the most vital for those who shoot and carry this style of firearm.
These are fundamentals everybody should aim at mastering and plan on working into their regular pistol training regime. The great thing is everything McKee covers can be done away from the shooting range. Though, it would be advisable to invest in some snap caps if you plan on going over these at home, just to add an extra layer of safety.
Whether you are a newbie building your skill sets or a veteran looking for a refresher, this video has some solid information. Either way, you’d better get ready to keep up. McKee is on rapid fire in this video, packing a lot of training into 3-minutes.
Saturday, April 12, 2014
Target Shooting Proves to be Potent Economic Engine
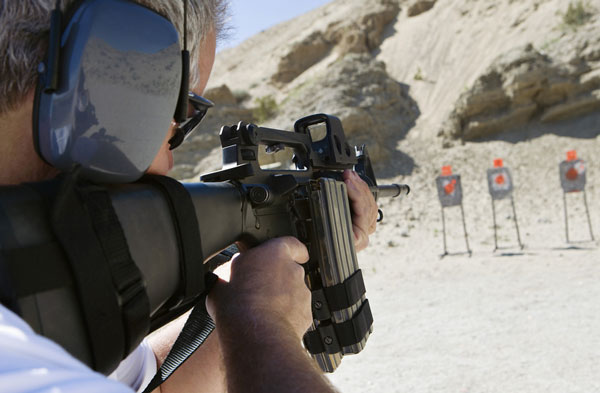
Target shooting is a potent economic engine.
Whether it’s a day at the range or an afternoon plinking tin cans, Americans love to shoot.
That isn’t news, especially for anybody taking the time to read this post. What might come as bit of surprise, however, is what sort of money American’s shell out to thumb off a few rounds each year. According to a new report by the National Shooting Sports Foundation, it’s no small potatoes.
When just the retail aspects of target shooting are calculated – guns, ammo, range time, etc. — it turns out Americans spend some $9.9 billion annually – more than the NFL’s yearly revenue. That’s pretty impressive, but it is dwarfed by the sport’s overall scope in the economy. If the total amount of spending that occurs in the economy as a result of target shooters’ spending is taken into account — what is known as the multiplier effect — the numbers become somewhat mind boggling:
As target shooters’ dollars exchanged hands, $23 billion in economic activity was created, producing $3.5 billion in sorely needed state and federal tax revenues.
The report estimates target shooting supported 185,402 jobs across the United States in 2011. When hunting is included the monetary and employment impacts of gun sports go through the roof:
Collectively, these two industries generate $110 billion in economic output and support 866,339 jobs. That’s more jobs than the combined employees of IBM and McDonald’s.
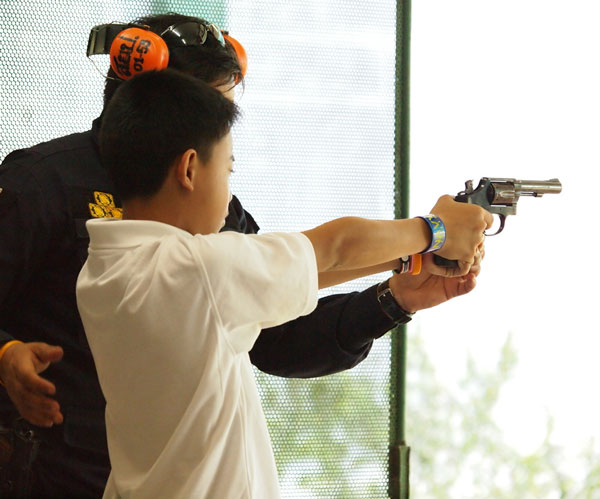
Target shooting is a strong economic driver in America.
Some other notable points from the report:
- The average target shooter spends 22 days in the field or at the range.
- Nebraska target shooters spent the most time thumbing rounds off with 38 days of participation each. Arizona and Oregon spend the second and third most time shooting, 36 and 35 days respectively.
- Californian shooters spent the most, shelling out $843 million annually. The next two biggest spending states are Texas ($812 million) and Pennsylvania ($483 million).
- The average spent per shooter each year is $406; the top three categories for spending are firearms ($194), ammunition ($58) and range fees ($35).
- When it comes to target shooting, rifles and handguns are roughly tied as the most popular firearm.
Monday, January 13, 2014
Desert Eagle .50 Cal World Record
Watch Jerry Miculek make five shots in 0.8 Seconds with the Desert Eagle .50, a new World Record. Recorded in super high speed you can actually see the bullets screaming out of this awesome handgun!
Wednesday, January 1, 2014
How to Shoot on the Move
Sooner or later you’ll need to leave the safety and comfort of the shooting bench and learn how to shoot while moving. The guys at PFC Training give you some expert tips on runnin’ and gunnin’ in this video.
Read More ...
Sunday, December 15, 2013
9 Must-Have Items in Pro Taran Butler’s Range Bag

Taran
Butler has made a name for himself as a top shot on the 3-Gun circuit, a member
of Team Benelli and an instructor for Hollywood actors. Below is an excerpt
from an interview Butler did with Barb Baird of Women’s Outdoor News. The big
question Baird had for someone who lives in his range bag, what exactly is in
it?
Trainer of
the stars and dubbed one of the most versatile competitive shooters in the
world, Hollywood’s Taran Butler is a no-nonsense, get-it-done-now guy. You
might know him as one of Benelli’s 3-Gun pros, and he has collected multiple
championships, including the Rocky Mountain World 3-Gun tactical champion (three
times) and SMM 3-Gun Tactical Champion, 11 times consecutively.
During the
height of his current competitive season, Butler took time to reveal what he
carries in his trusty range bag, made by Green Mountain.
“I have
been using the Green Mountain bag since 1996, and it’s awesome—not overly big
or too small, and it can handle brutal baggage handlers. It’s by far the
ultimate bag,” said Butler. For 3-Gun matches, Butler shoots a custom TR-1
ULTIMATE AR-15, TTI Glock 34, TTI ulti-mate Benelli M2 and a custom Infinity
1911.
Here’s what
you’ll find in his range bag:
·
Infinity
1911 24-round magazines
·
BLADE
TECH holster belt and mag pouches
·
Federal
and Black Hills ammo
·
Tools
and replacement parts
·
Pro
Grip spray
·
Oakley
glasses, Vltor fitted hat
·
4-shot
shotgun Kaddys
·
Aquafina
water, vitamins
·
PMags
Thursday, December 12, 2013
Learning the Art of the Draw

Choosing to carry a concealed handgun for
self-defense is a good start to being prepared for an attack, but simply carrying
a gun isn’t enough. You also have to know how to use that gun.
The basics of shooting and marksmanship are quite
simple—grip, sights, trigger control and follow through—and can be easily
learned. More advanced gun handling skills can be learned through research, or
by attending one of the many firearm academies across the country.
While gun handling and accuracy skills are
important, if you can’t get the gun out of the holster and into action quickly,
you’ll be standing there with a lot of knowledge in your head and nothing in
your hand. This makes the draw one of the most important components of proper
self-defense. And you must be able to make the draw at any time and from any
position.
Understanding Technique
Now before developing your draw, you have to
decide how you’re going to carry. Some methods of carry provide easier access,
while others impart deeper cover. There is no single correct way to carry a gun
and only you can decide the method that works best for your purposes. But
regardless of how you carry, you must master the draw for the holster system,
or systems, that you choose.
The standard draw consists of four simple
motions—the grip, the pull, the rotate and the presentation—that must be
conducted in sequence or the entire process disintegrates and problems arise.
Everything in the draw begins with the grip.
When you reach for your handgun, you must
instantly obtain a shooting grip, with the trigger finger aligned along the
frame. If you don’t get a firm grip on your handgun before it exits the
holster, the draw can be fumbled and the gun dropped, which won’t do any good
and could very well cause a lot of harm. You then pull the gun straight out of
the holster before rotating it toward the target—from here, you can fire if the
attacker has gotten too close to fully extend the gun. Finally, you present the
gun toward the target, allowing the support hand to come up into a two-hand
shooting grip as the sights line up.
Developing the Proper Draw
Now the problem with the standard draw is that it
is based on carrying a gun in a strong-side holster, and there are as many different
ways to carry a gun as there are types of handguns to carry. Fortunately, the
draw is basically the same in all cases, with some minor variations.
Developing a proper draw takes time and practice,
especially if you carry in multiple ways, as you must always be aware of where
your gun is located and the best way to get that gun into action. You must
develop the muscle memory for each and every way you carry. This is one of the
reasons that many experts recommend carrying the same gun in the same way all
the time. It doesn’t matter how good a shot you are if your gun is sitting in
your holster.
The choice of carry method can also determine
whether you can practice drawing at your local range. While some ranges do not
allow draw training at all, others limit it to those methods like strong-side,
pocket and ankle where the shooter is not sweeping the muzzle across adjacent
areas. Unless you have your own range or shooting area, it’s very difficult to
obtain live-fire training with cross draw, shoulder and small-of-back set ups.
Availability of training locations should be included when considering how to
carry a concealed handgun. Commence Training
Regardless of your carry method, training should
always begin with an unloaded handgun. Even if your range allows drawing from a
holster, you should still learn the motions through dry practice, which can
easily begin at home. It should also begin without a cover garment, even though
the final goal is a safe, smooth and fast draw from concealment. Starting with an
unloaded gun sans cover garment allows you to learn the proper movements before
introducing live fire and more complex motions, such as drawing from under a
shirt, jacket or vest.
Always start slow and deliberate, and speed up as
the motions blend together naturally. You can even include dropping the hammer
on a target (make absolute sure your gun in unloaded) using one of the
available laser training cartridges, such as LaserLyte’s LTS Training
Cartridges, to get a good idea of your accuracy in a draw type situation.
While dry practice is good— sometimes it is all
one can get— live-fire training is the best way to get a true feel for the
effectiveness of your draw in a fight. As the gun is now loaded, you should
again start slowly, firing one round per draw. As you become more comfortable,
add speed and additional shots—two to three rounds—to the mix, before
introducing a cover garment.
To reach a gun covered by a jacket or vest, you
simply sweep it back with your hand to reveal the gun. You can help this
process is by having an object in the pocket that is heavy enough to provide
momentum to swing around the gun – a spare magazine or speed loader works well
for this. If you’re using a shirt as a cover garment, you can reach under it
with one hand to obtain a grip, but many people use their support hand to lift
the tail, especially if the shirt is tucked around the gun for better
concealment.
Of course, since few people use a single type of
garment to conceal a gun, both methods should be practiced. Also, every time
you change something in your set up—gun, holster or cover garment— consider
unloading the gun and practicing a few draws in a mirror to ingrain the motions
in your mind. Using a mirror allows you to view the motions, correct any
mistakes and provide a target for lining up the sights.
Be Prepared
Finally, you must remember that an attack can
come at any time, not just when you’re standing up and ready. You might be in a
car, sitting in a restaurant or kneeling to tie a shoe. You might have to reach
across your body with your support hand, kneel behind cover or even draw from
the ground. The possible scenarios are almost endless. For this reason, you
should implement training that includes difficult draws in a variety of
locations. Again, many of these can be practiced at home with an unloaded gun.
You can obtain feedback by using a mirror or a partner, who can suggest
realistic scenarios that you might not think of yourself.
Now a concealed handgun along with the ability
and wherewithal to use it is important. But many attacks end without a shot
when a gun appears in the hand of a so-called “victim.” Whether facing a
strung-out punk or a seasoned criminal, the first defense remains avoiding the
situation, the second is drawing a gun and the last is taking a shot. Your draw
is just an important as being able to consistently ping the 10-ring, and in
many ways, much more important.
Tuesday, December 10, 2013
Two Critical Accessories in Building a Defensive AR-15
When it comes to an AR-15 that I plan to use
exclusively for defensive reasons, there are really only two items I like to
add to the gun: some sort of white light and a sighting device other than iron
sights. I don’t have anything against iron sights, but in low light situations,
they can come up short. There are a many other extras that can be added to a
tactical rifle, and special operators may even need others for a particular
mission, but the simple AR with these two necessities is not only all a guy
needs, but may prove to be tactically superior to a rifle with a bunch of
additional items strapped on.
Choosing Your Sight

As far as a sight is concerned, I like the red-dot
types. For my high mileage eyes something like an EOTech, AimPoint or one of
the mini-red dots really improves my speed in lining up on target—particularly
in low-light situations. Another great option for the defensive rifle is one of
the 1.5×5 scopes that can be like a red dot on low power, but also offers some
magnification for longer distance shots. Leupold’s MRT is a great choice in
this department.
Depending on your intended use, this might even be a
better choice, but for most home defensive and close-quarter situations, a
red-dot or iron sight will be a better choice. Remember, it’s not outside the
scope of operation to make long shots with a red-dot or iron sights,
particularly with good eyes and practice so don’t discount these options just
because you expect to shoot farther than 50 or 100 yards now and then. My
patrol rifle is topped with an unmagnified EOTech and it’s capable of accurate
300-yard connections.
I had an opportunity to try out a medium-sized red dot
from Meopta recently—the M-RAD, which proved to be a rugged little unit that
can be used on a Picatinny-railed AR without a lot of added weight. It has a
heavy hood to protect the optic and the on/off button is on the forward side of
the sight for easy manipulation when shouldering the rifle. The same button can
be manipulated when the sight is turned on at the shoulder to get the
brightness appropriate for conditions.
Light Selection
With sights decided upon, it’s now time to be prepared
to precisely evaluate any threat while maintaining the ultimate level of
readiness. You cannot evaluate a threat properly if you cannot see it. One of
the best advancements that I have seen over the years pointing guns at people
in the dark is lighting.
One of the first “modern” lights I owned was a
Streamlight rechargeable flashlight. It was big and heavy, but much brighter
than its predecessors. Now, almost 30 years later, I still look to Streamlight
for my lighting needs. The lights are smaller, brighter and have functions like
strobe, which in law enforcement, we were always taught to do manually.
Streamlight’s TLR-1 HL, which I assume stands for high
lumens, busts out a whopping 630 lumens of light with a pistol-sized gun light.
For close quarters defensive use this light is adequate on the carbine as well
as the pistol. On the rifle it doesn’t add much weight or size and will light
up, or blind, anyone in the room or area you are searching. It has an easily
manipulated on /off switch, which allows the user to set it to momentary,
all-on or strobe illumination.
The Streamlight TLR-2 HL boasts the same 630 lumens
with a built in laser, which could be an alternate sighting device on your
carbine or pistol should the condition dictate. Normally I’m not a fan of
lasers, but for no extra weight or convenience, a laser can be waiting for duty
should you need to make a shot without a sight picture. I mounted this light
with Streamlight’s quick mount on the bottom rail of my AR. It was amazing how
well it lit up any room in the house or outside around the house. I could
evaluate a person’s hands at 25 yards easily.
Subscribe to:
Posts (Atom)